Check back soon
Once posts are published, you’ll see them here.


Sup Guys!
It's Ridhi with another super cute diy.
My phone has been looking really dull lately. It just doesn't suit my style. I'm really happy how it turned out. So enough with the intro and lets get started :-

You will be needing :
Your phone case (Of course :P), Nail polishes or acrylic paint and a correction pen.
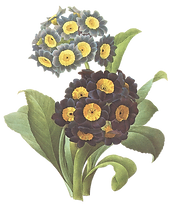
- At first, make sure your phone without any stains (My phone had A LOT of chocolate stains {0.0}). After that, you just need 2 of your colour's (Either the paint or nail polish). I wanted a floral pattern so I just made an irregular circle like shape and with my darker colour I just made a ripple pattern. As a guide for using the darker colour, I suggest looking at a real rose or something from the internet. For the leaves, I used light green and yellow acrylic paint. Just draw some thick, irregular lines with your paint & for the highlights, make the tip a bit yellow from the sides. Let all that dry for some time. When its all done, draw 2 lines wherever you like, I drew it a bit below the camera hole of my phone and right above the camera hole. Paint it all black and after that, take your correction pen and write your name, your initials or just anything you like. This step is totally optional and you can skip it if you like. For an extra shine, I used clear coat nail polish and paint it all over the case. And it's done❤
I seriously love this diy and it's a really girly one. You can customize it however you like it.
See you next week with another super easy diy!
Toodles.
~Ridhi
Comments